A few years ago I made the claim to a friend that I was a good typist even though I had never learned
properly. The next time I was typing I paid more attention and realized I was horribly wrong. I decided
pecking away with 3.5 fingers was not acceptable and began to learn to type properly. That started a
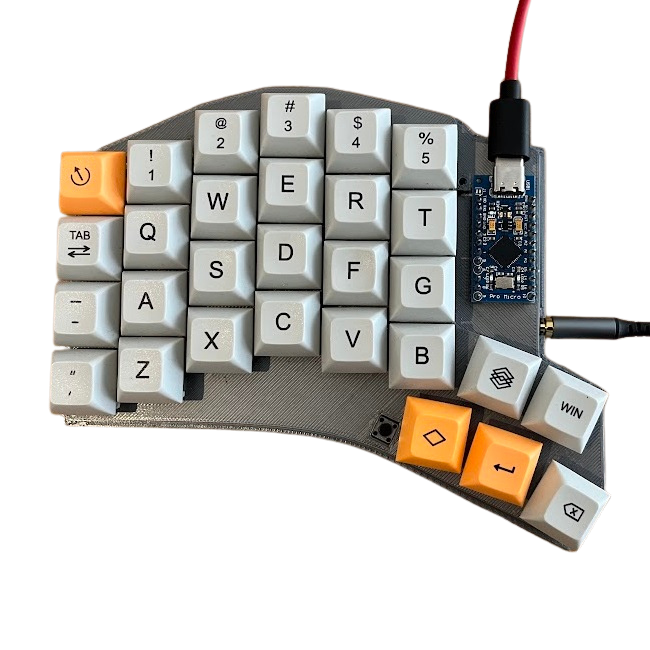
steep decline into the keyboard optimization rabbit hole. I tried a few different mechanical keyboards
and as I learned more, realized I needed to try a split keyboard. I made the strategically sound
decision to save $250 and instead spend over 50 hours designing, 3D printing, and assembling my own. For
my full process, please see the dedicated project page.
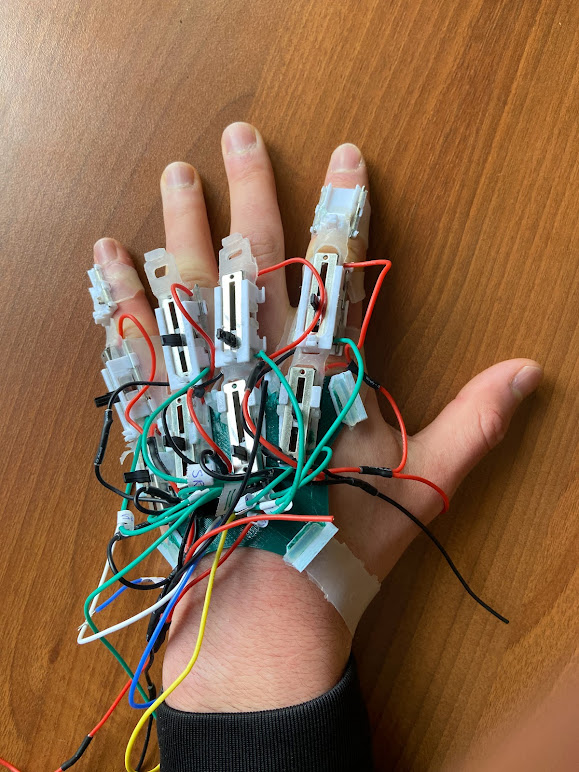
My original idea for this glove was as an alternative input device for 3D modelling. I thought it
would be interesting to have the ability to interact with a model, orbiting, zooming, and so on, using
gestures. I spent a lot of time perfecting the mechanical design, trying to optimize it to be low
profile and comfortable. I have also taken the software to the stage of being able to use finger
movement to type on a bluetooth connected computer. See the dedicated project page for more details and
the iterations I went through to bring it to the stage it is at.
My university capstone team was tasked with developing a technological solution to the problem of
cyclist dooring. Dooring occurs when a cyclist collides with a parked car door opened in their path. Our
solution involved a computer vision based cyclist detection system integrated with a car's door locking
mechanism. When a cyclist was detected, the door would be temporarily locked, indicating to the
passenger that a collision was imminent. We were able to develop a proof of concept prototype and
install it on a car door for a demonstration at the Toronto parliament building. For further details
please see the dedicated project page.
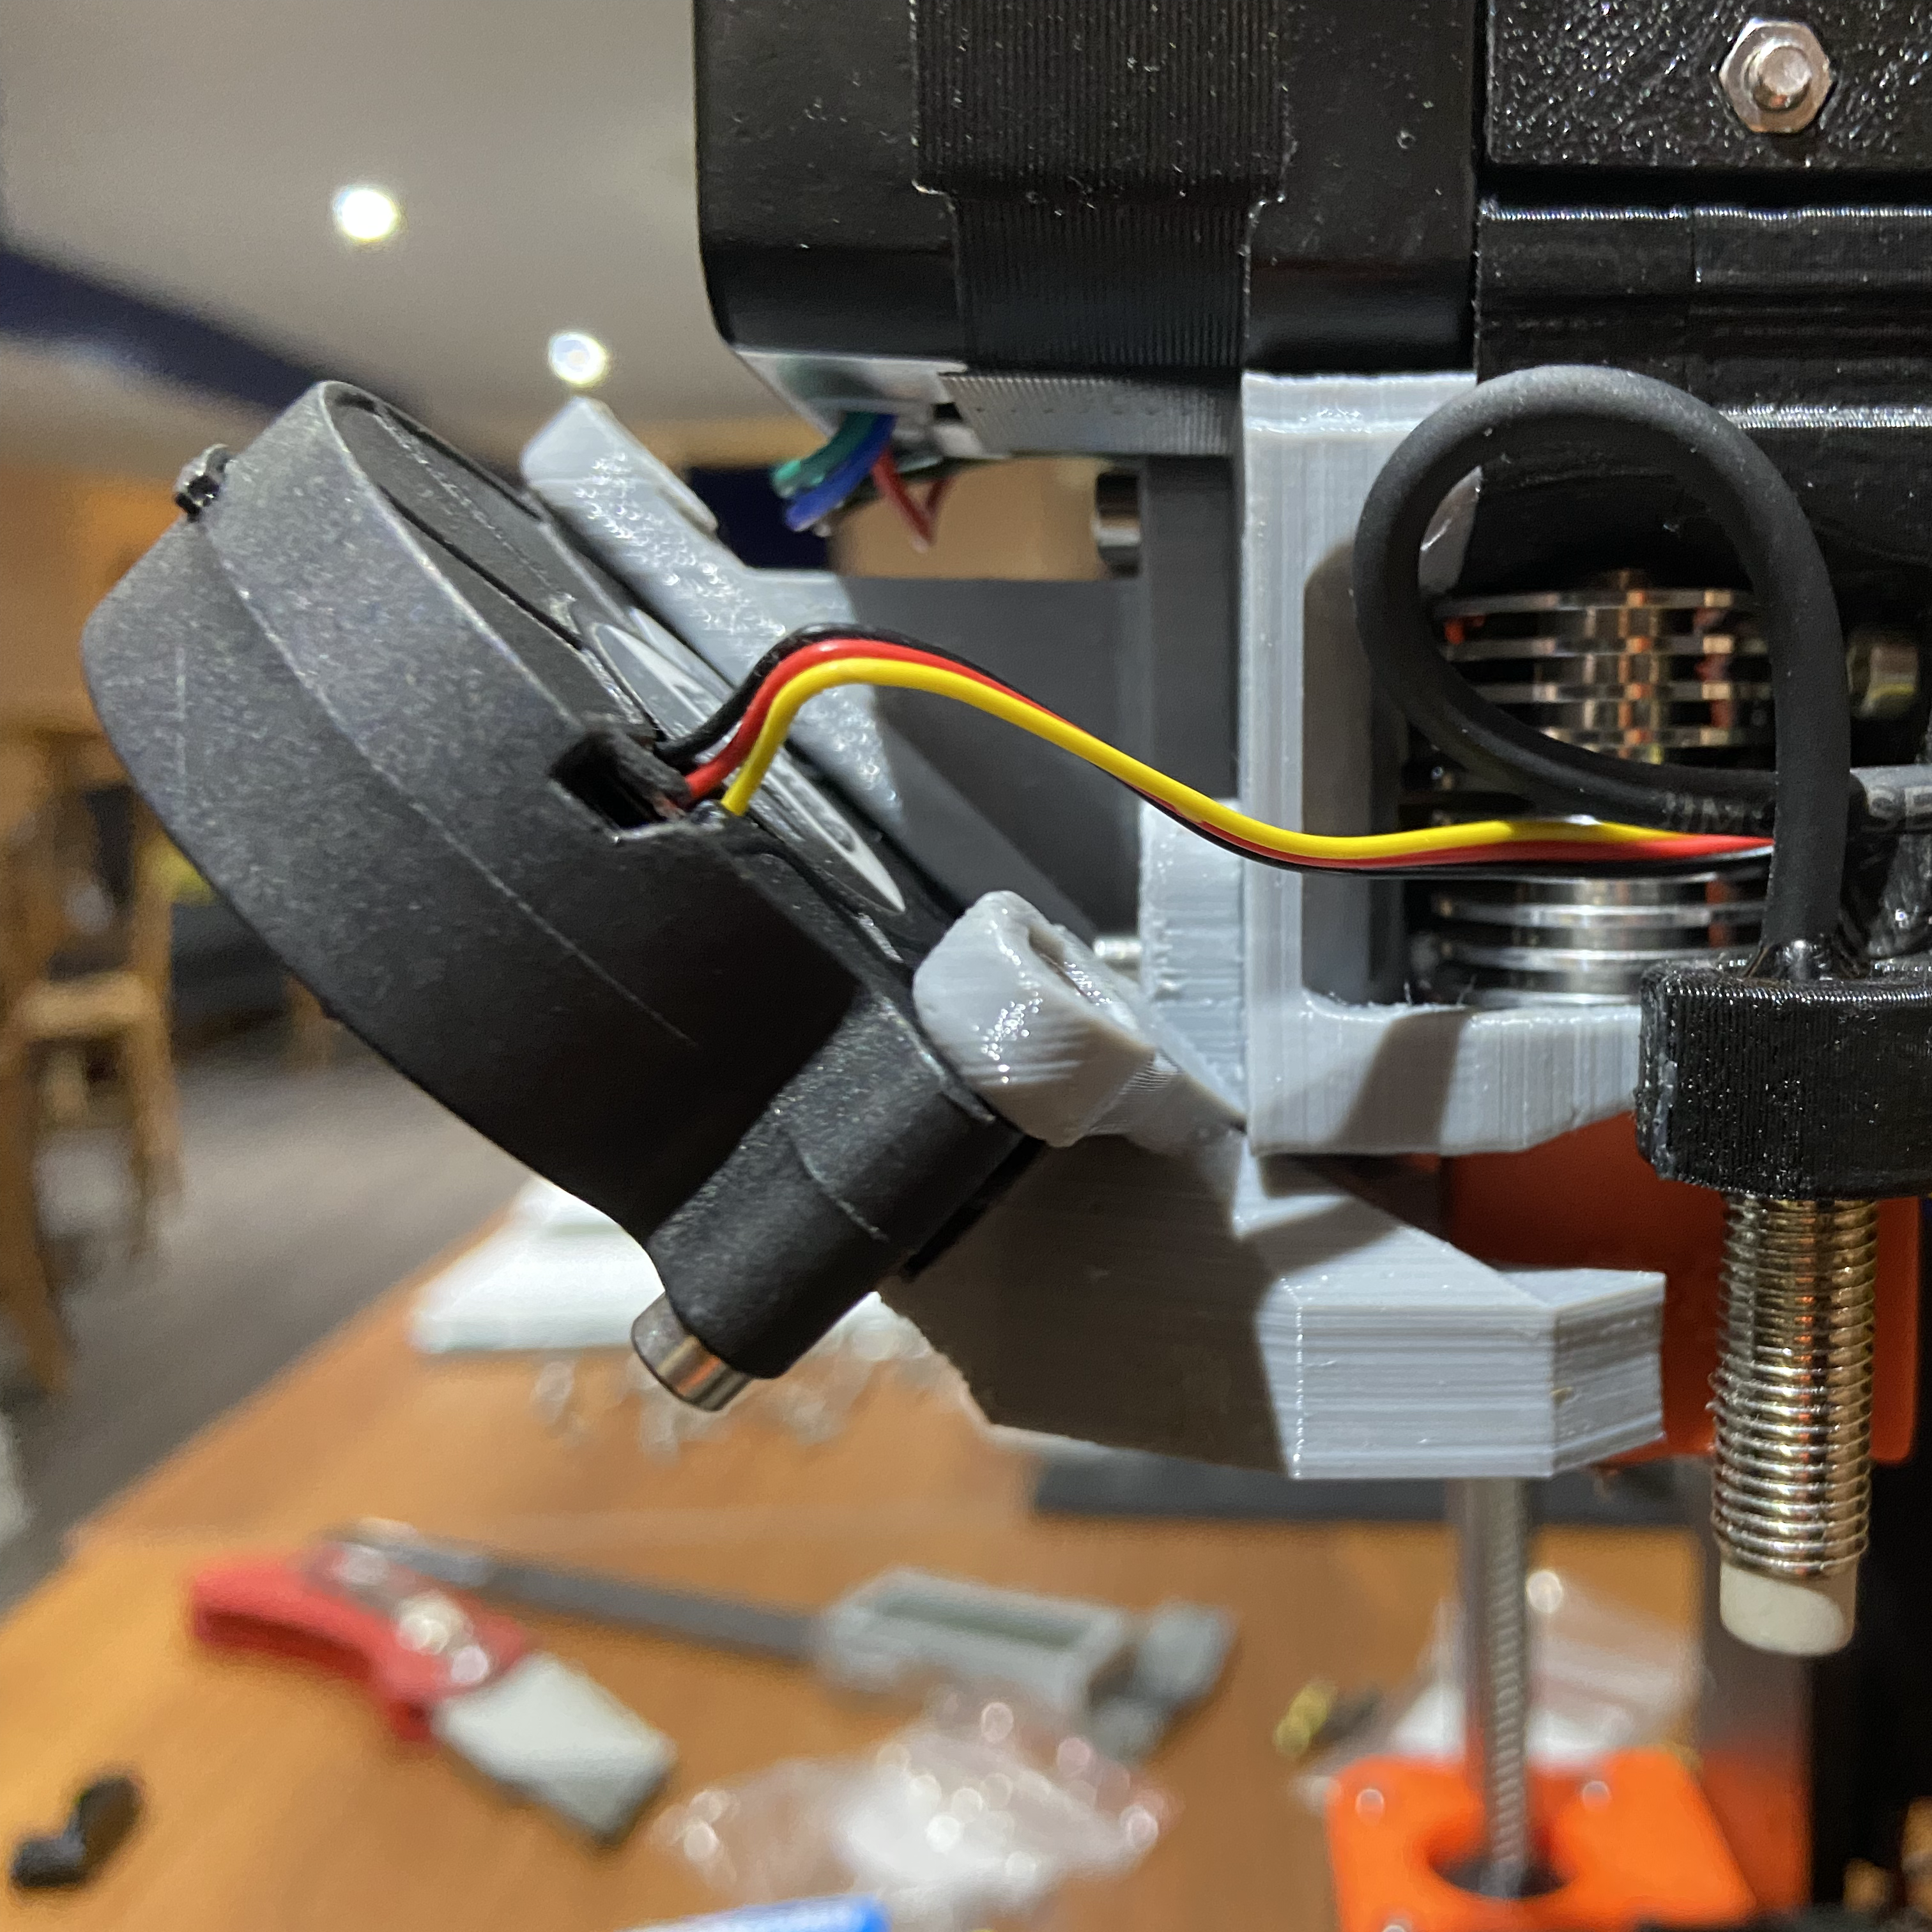
3D Printer Fan Shroud
In order to get higher throughput with larger nozzles on my Prusa MK3S, I decided to upgrade to a
volcano heat block. I was not able to find a suitable fan shroud model online so I designed one myself.
I recreated most of the geometry from the stock part STL files and then modified it to suit the larger
heat block. I combined the fan support arm with the fan shroud and modified the fan shroud air channels
to better direct the air onto the part. One mistake I made on this project was committing to the heat
block upgrade too soon. I found out too late that the new fan shroud did not work well so I was forced
to hobble together a temporary solution. That allowed me to fix the model and reprint a working
version.
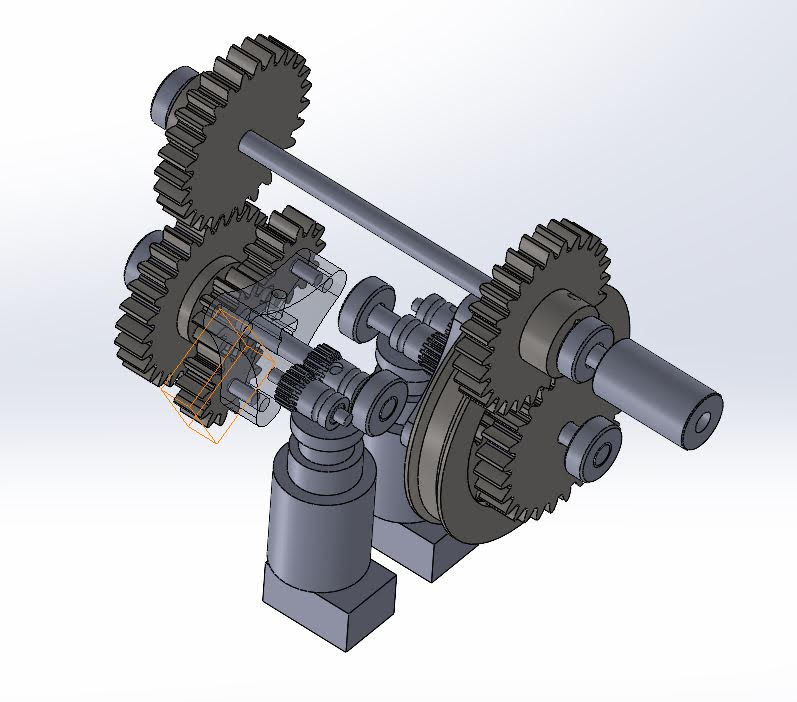
3D Printer Dual Extruder
I came up with this concept during a university project where I worked with a group of
other students to design a 3D printer. This extruder uses planetary gear train clutches
to drive 2 extruders with one motor. The goal of the design is to have the benefits of a
dual direct drive extruder without having the weight of 2 motors on the print head. The
trade-off is that it will likely take up more space and significantly increases the
complexity of the extruder. It is possible that the design could be improved using some
alternative method to redirect the power from one extruder to the other.
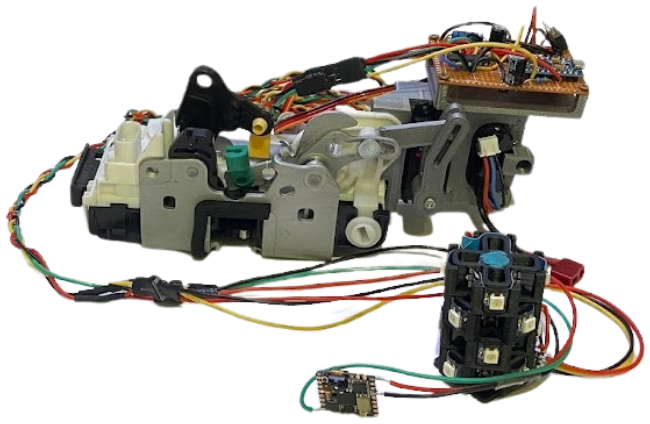
I later developed a prototype of the clutch mechanism. It was a very rough
proof of concept to test whether the geometry made sense and if I could get the clutch mechanism
working. It was a success in both respects. It featured a stepper motor controlling the
"extruder", a servo motor controlling the ring gear break for the clutch, and of course a bit of
duct tape.
3D Printed Monitor Stand
I like to stay positive and looking back and forth between my side-by-side monitors made me feel like
I was saying no all the time. To resolve my negativity, I decided to try out a stacked monitor layout. I
was not able to find a stand that would work with both of my monitors and my desk so I decided to design
and 3D print a stand. The stand shown is custom fit to the bottom monitor and interfaces with an adapter
plate using the standard mounting pattern on the top monitor. One screw is used to lock the stand to the
bottom monitor and another to lock the top monitor in place on the stand. After modelling my initial
concept, I printed a thin profile to check dimensions. After a few iterations of dimension testing, I
was happy with the result and have been using it ever since.
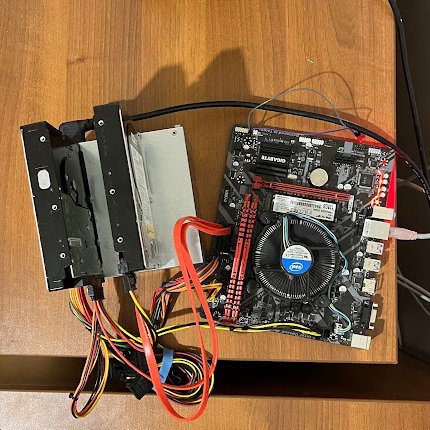
Home Server
A few years ago I tried to help my dad set up network attached storage for his small business. After
doing some research, I concluded that he needed a raid drive configuration with samba sharing and of
course a wireguard vpn so that I could access and maintain the system from my home in another province.
I started with the vpn and after a week of no progress, had to give up. Over the next few years, I
slowly dug into each one of these systems and have now successfully implemented all of them. I built my
server from used parts and successfully established remote access through a vpn tunnel. My server now
also acts as a NAS and serves my personal website. It has been a long process involving many many
tangents to get things working that will make the service I want work. However, I have learned a ton
about linux, programming, and how the internet works. My next goal will be setting up an off premises
backup server so I can feel confident in taking the leap away from cloud storage providers to my own
system.
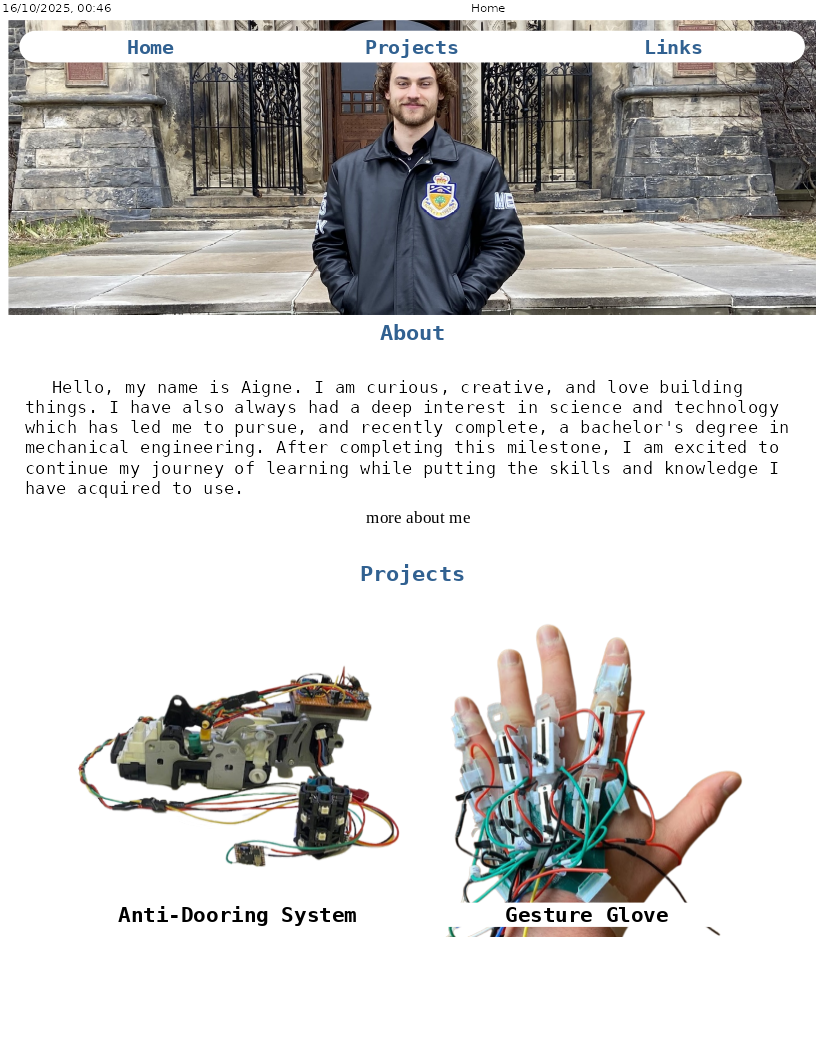
Website
I created this website to document my personal projects. It is created with free-range grass-fed html
and css. It has a go backend which takes advantage of the net/http and html template packages. It is
currently served from my home server through nginx. Creating and setting this up has been a long process
but has given me a better understanding of how servers work and opened my eyes to some of the
possibilities for taking advantage of the internet for personal tools.
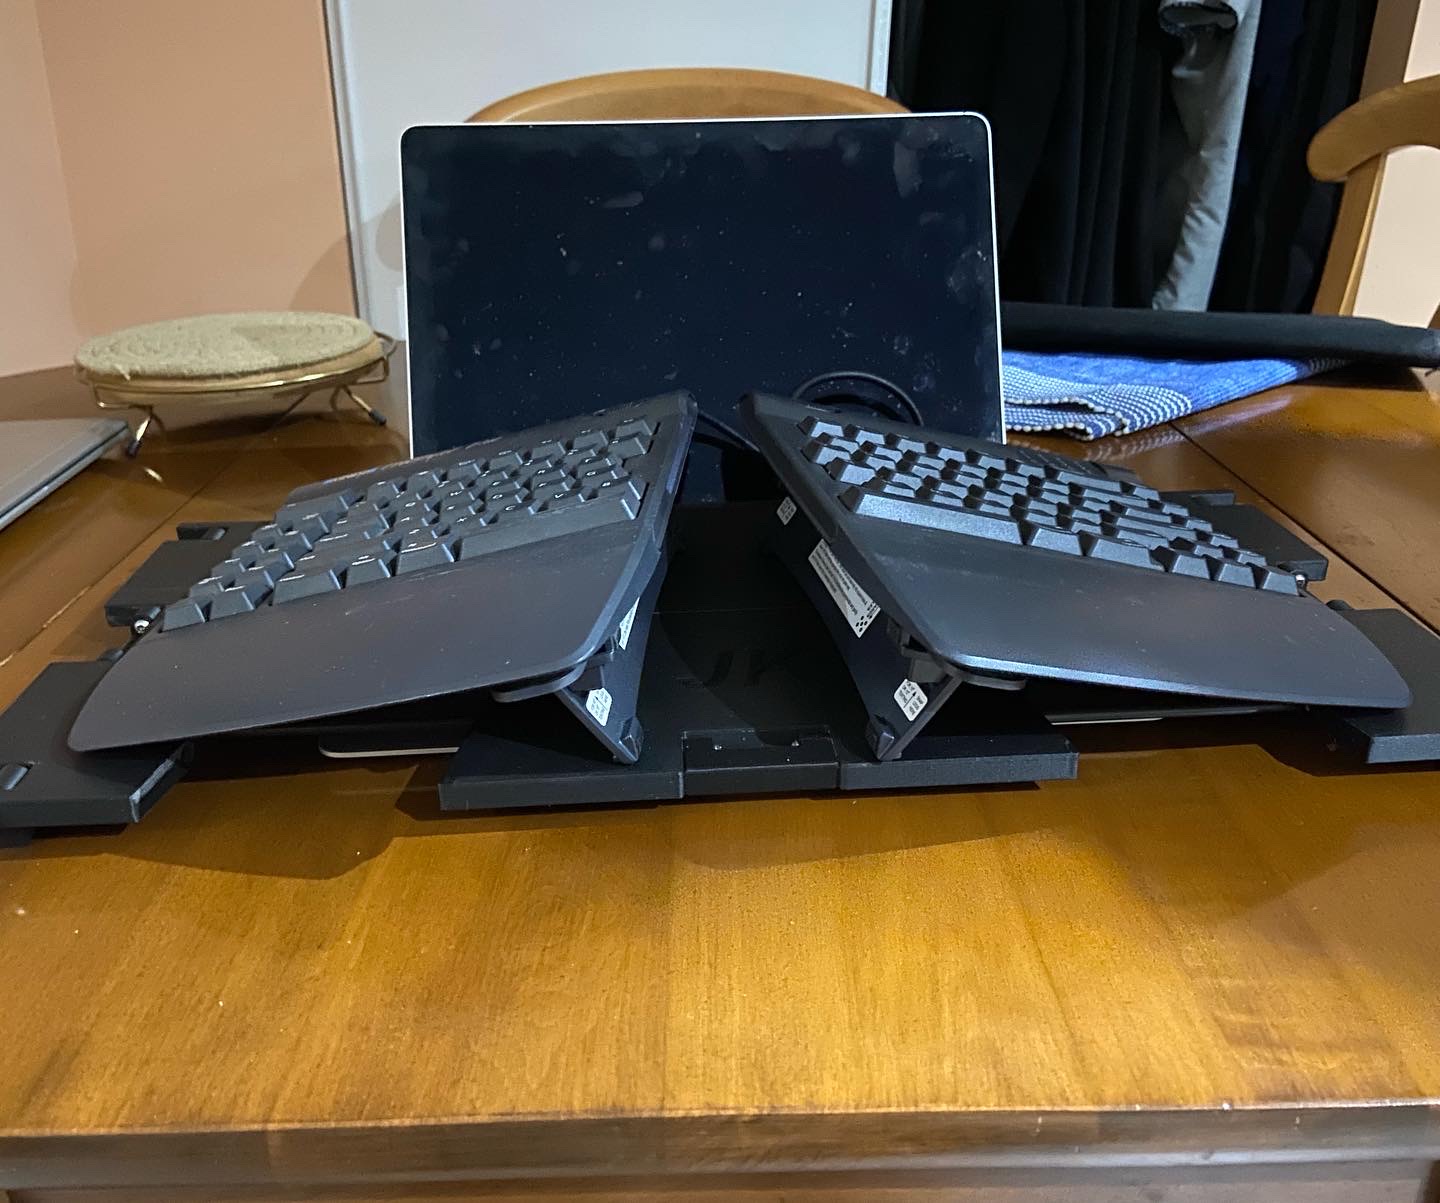
Split Keyboard Stand
A friend of mine was experiencing severe wrist pain, requiring her to use a split, tented keyboard.
She asked me to design her something to replace her current setup consisting of several blocks of wood.
I was able to achieve her requirements of a lightweight, portable stand to suspend her keyboard above
her laptop keyboard. The stand features carbon fibre rods that allow it to extend to support the width
of the split keyboard. The feet fold into the body for transportation but prevent the split keyboard
from interfering with the laptop keyboard when deployed.
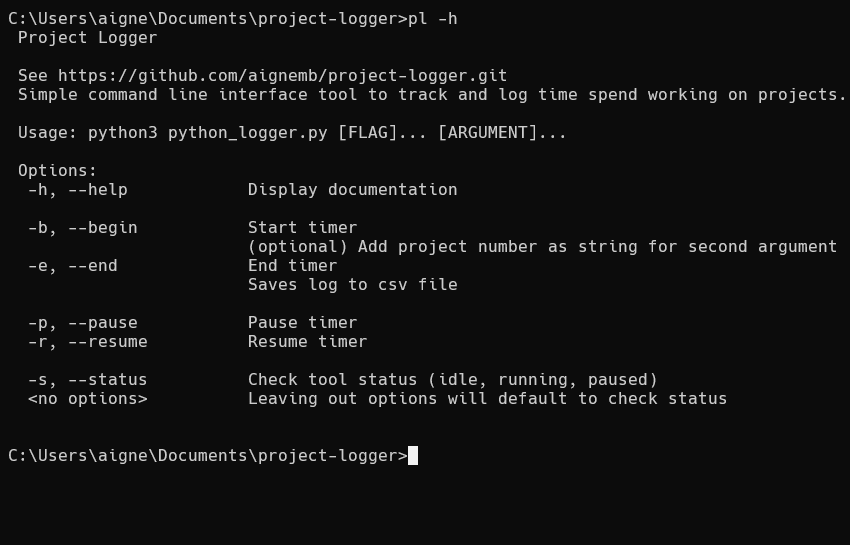
As a junior project manager at a small company, I am constantly switching
between a number of different projects. I found it difficult to keep track of my time so I built this
command line interface tool to simplify timekeeping. It allows me to start, stop, and pause a timer
which I can allocate to any project. Once I end a timer, it gets appended to a log file in a csv format,
capturing the date, the project, and the start and stop times for each segment of time where the timer
was running. At the end of each day, I transfer this to excel and sum all of the projects. The start and
stop timestamps also allow me to easily backtrack if I forget to start or stop the timer at some point.
I have found this tool immensely useful and hope to add more quality of life features in the near
future.
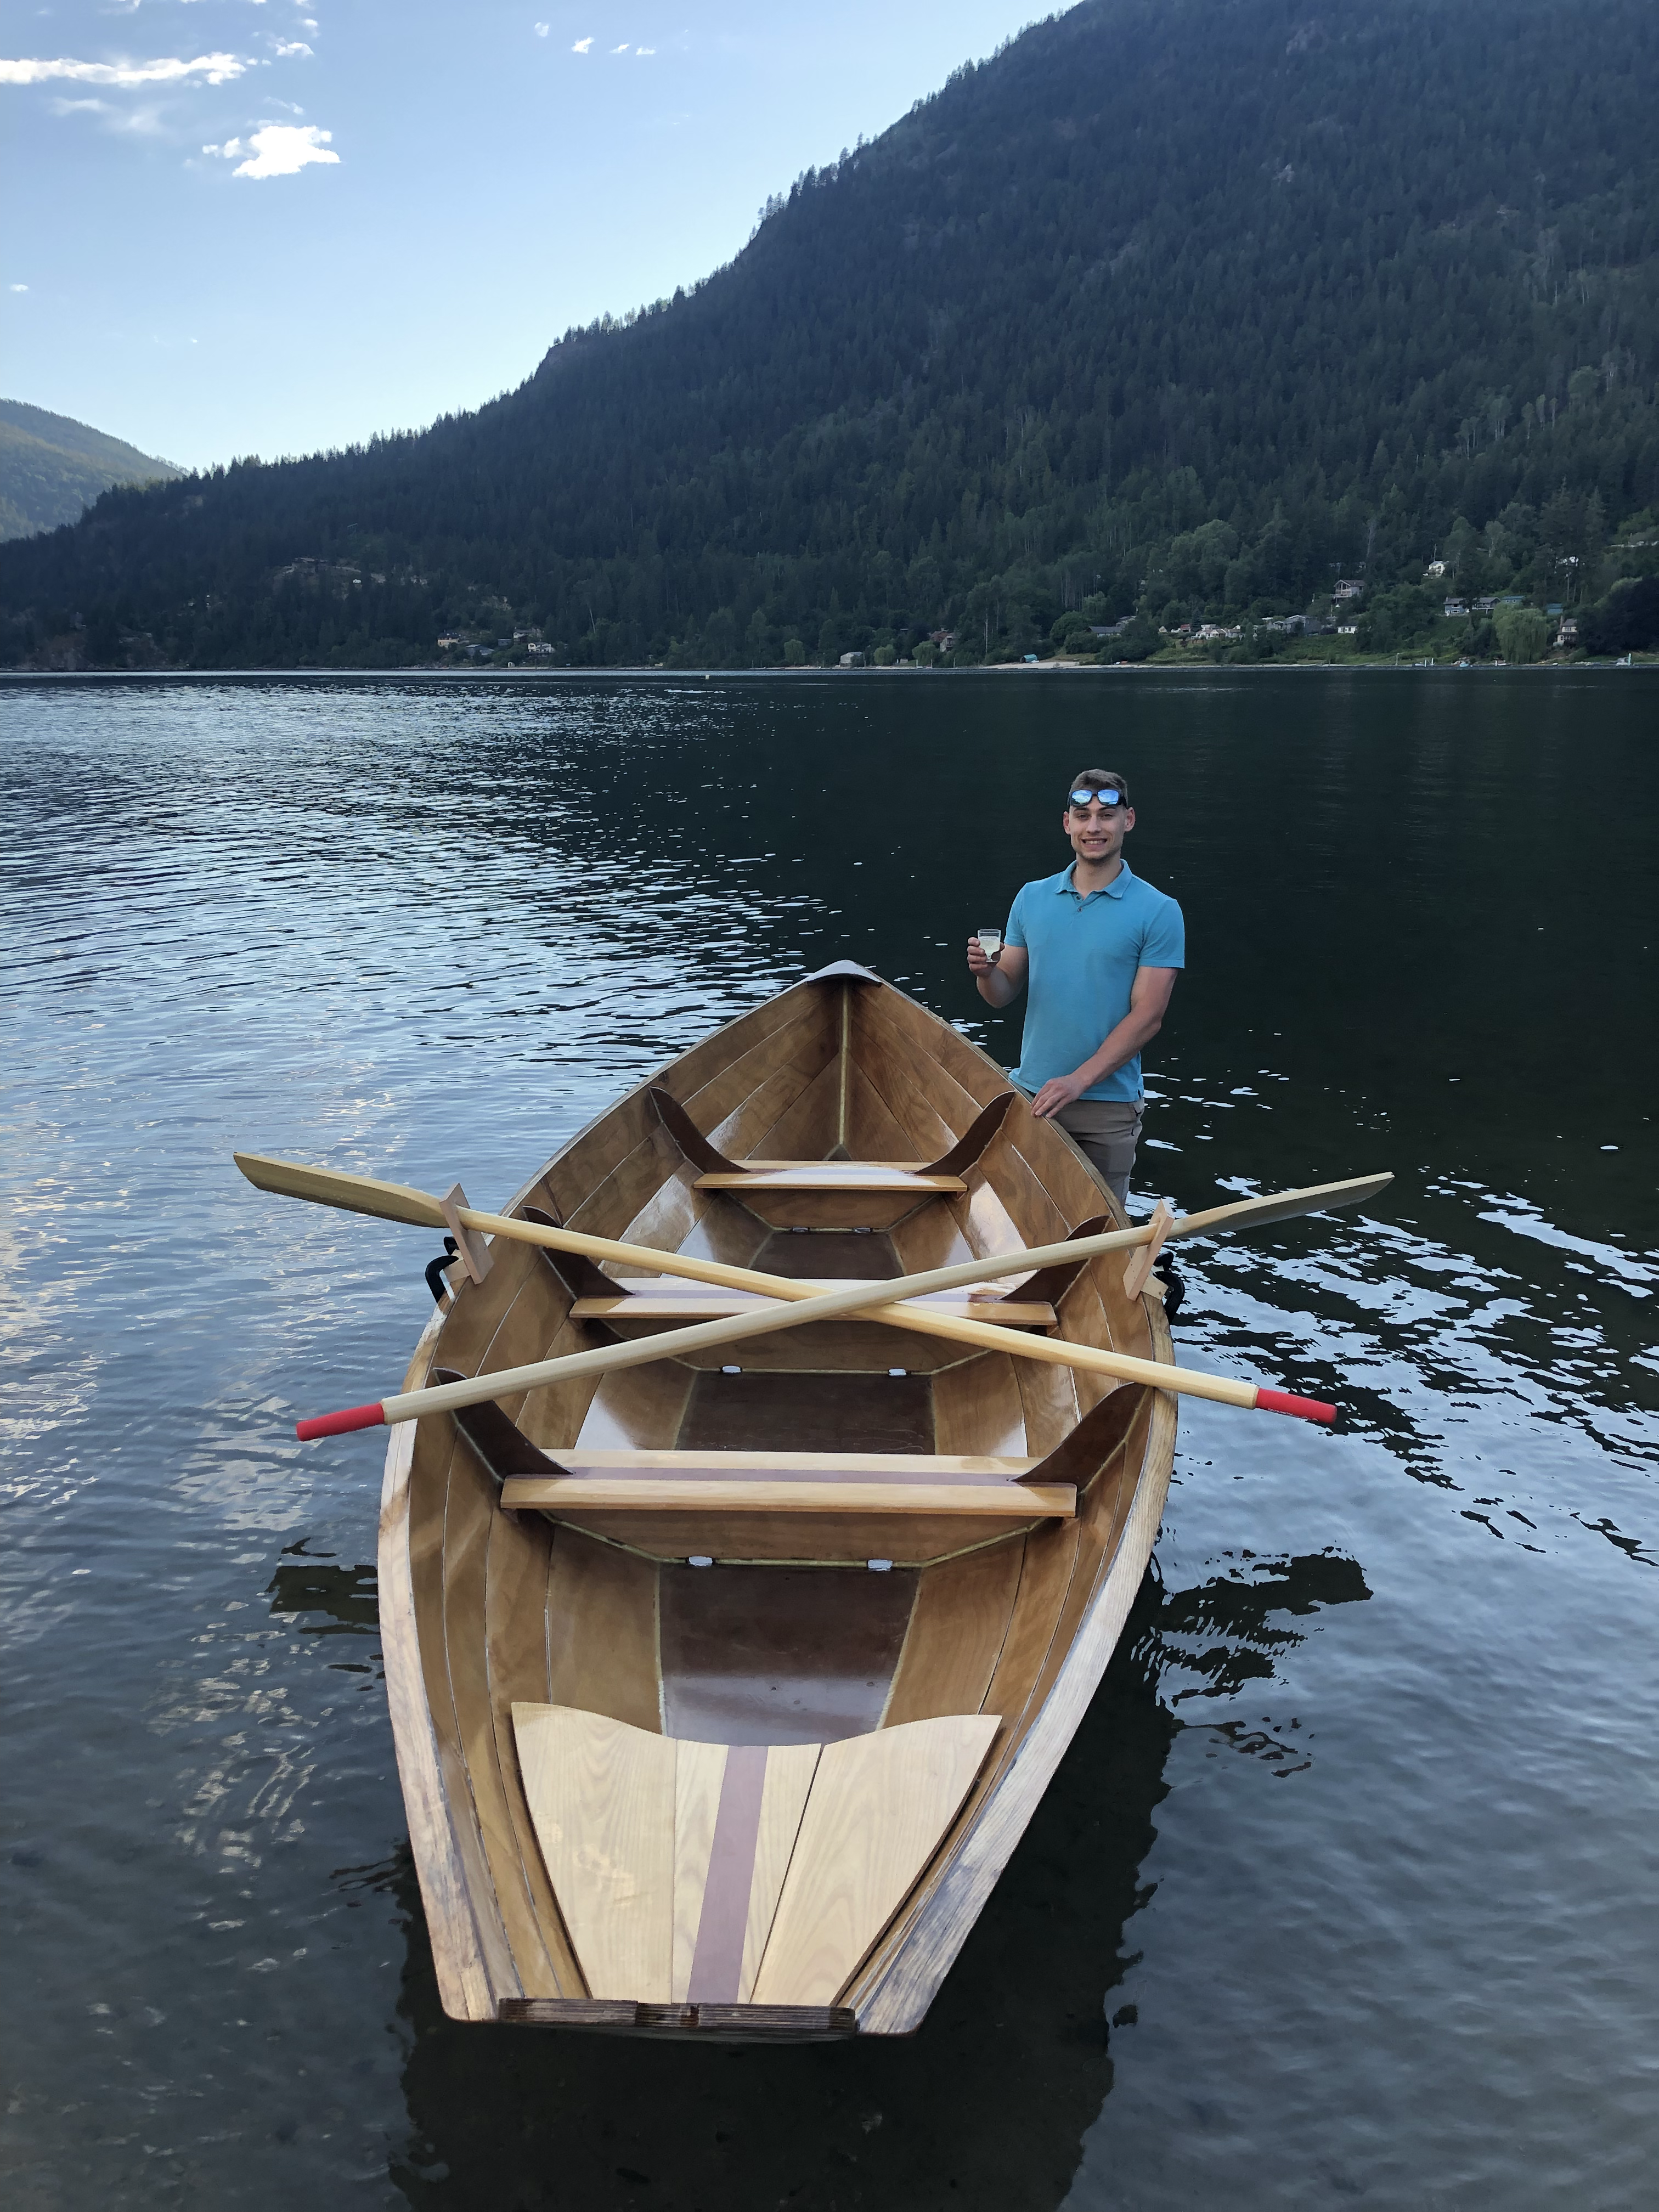
Wooden Boat
I started working on this boat 12 years ago for a school project. It is a Northeaster Dory which will
eventually have rowing and sailing capabilities. I experienced some major challenges with the epoxy I
was using and abandoned the project for several years. I recently restarted and was able to progress to
the non-sinking stage of the project. I still have a lot of work to do to add in the sailing features
but I am very happy with how it turned out. Overcoming the challenges I faced on this project has given
me a lot of confidence to persevere and find solutions.
Resin 3D Printer Vent Fan
I recently got a resin printer and do not have a well ventilated space to print in. This project was a
quick solution to try to get the majority of the fumes out of the room during the long periods of
printing. It uses 3 120 mm fans and screws into the printers vent port.